This post walks through some simple steps of setting up a standalone MongoDB Community Edition on AWS EC2 with default configuration. It includes the
It includes the steps of installation and configuration:
- Provision an AWS EC2 instance with Amazon Linux 2 (Free-tier Eligible)
- Configure MongoDB package repository metadata file on Linux
- Install MongoDB and manage mongod process through systemctl
- Uninstall MongoDB and its directories
Provision an AWS EC2 instance
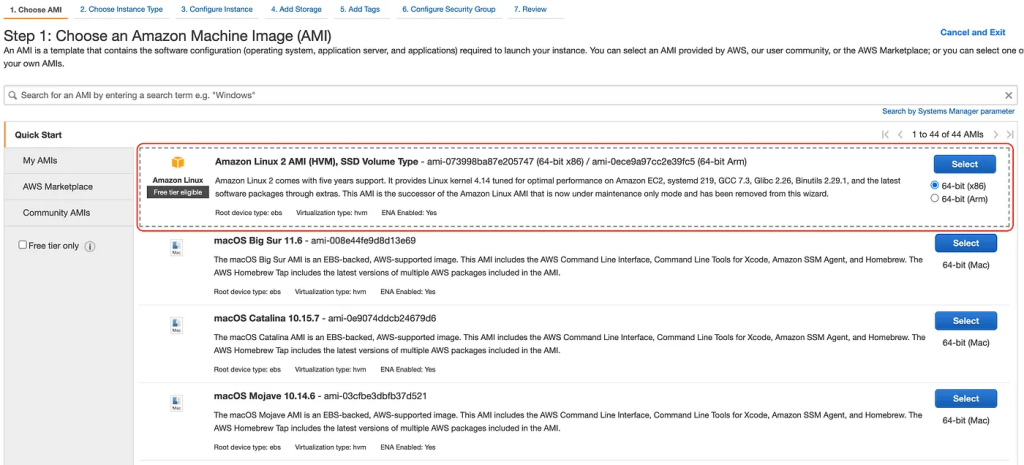
Step 1: Choose an Amazon Machine Image (AMI), select Amazon Linux 2 with Free-tier Eligible as cost matter.
Note: MongoDB is not currently available and compatible with Amazon Linux 2023.
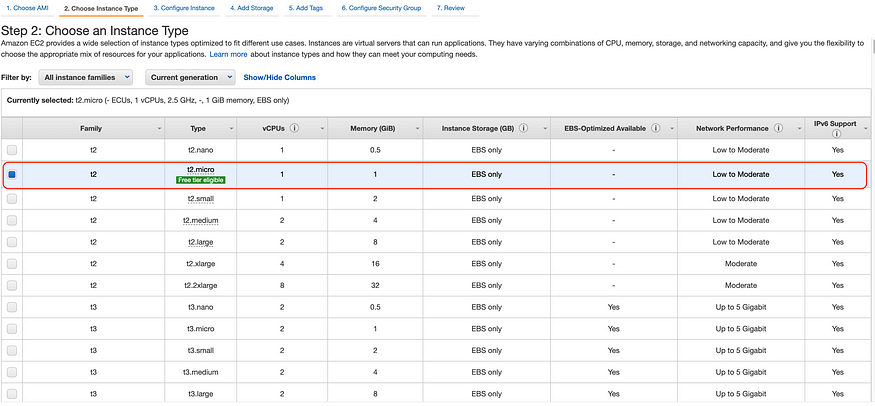
Step 2: Choose Instance Type with Free-tier Eligible option
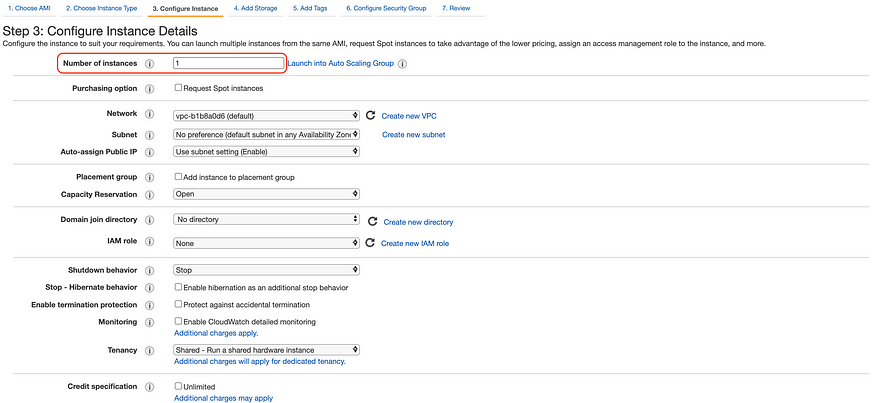
Step 3: Configure Instance Details, keep all configuration as default.
Step 4: Add Storage, keep default configuration for this lab.

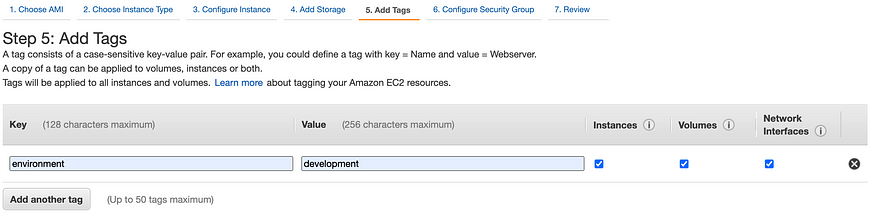
Step 5: Add Tags, add { key: environment, value: development} for further tracking as below screenshot.
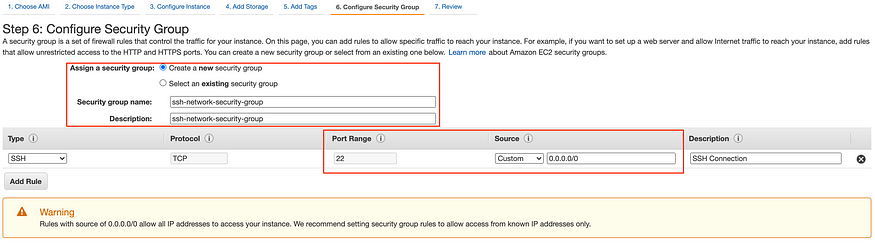
Step 6: Configure Security Group, choose Create a new security group for port 22 for SSH connection.
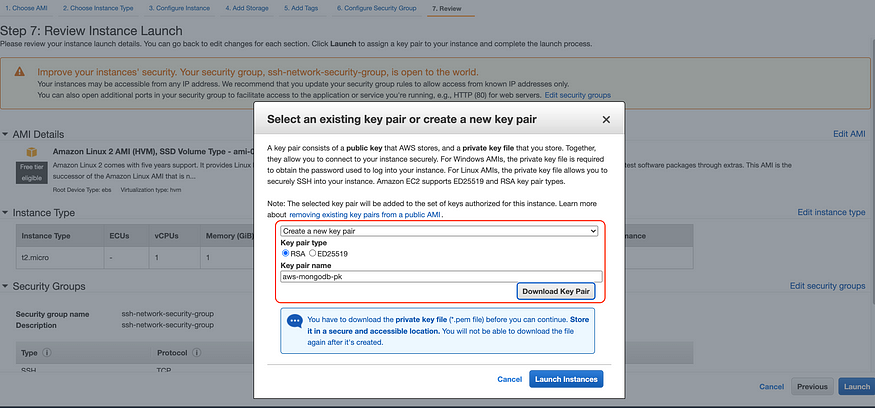
Step 7: Review Instance Launch

Step 8: Create new key pair for SSH connection, select Create a new key pair, define name for private key and download it, then Launch Instance.
Step 9: Execute ssh to EC2 instance with public IP of EC2 instance
ssh -i aws_mongodb_instance.pem ec2-user@<aws-ec2-instance-ip-addr>
Install and configure MongoDB instance
Step 10: Verify Linux distribution of current EC2 operating system
$ grep ^NAME /etc/*release
Step 11: Create package management repo metadata file
$ sudo vi /etc/yum.repos.d/mongodb-org-5.0.repo
Step 12: Add configuration for package repo metadata
[mongodb-org-5.0]
name=MongoDB Repository
baseurl=https://repo.mongodb.org/yum/amazon/2/mongodb-org/5.0/x86_64/
gpgcheck=1
enabled=1
gpgkey=https://www.mongodb.org/static/pgp/server-5.0.asc
Step 13: Install MongoDB package
$ sudo yum install -y mongodb-org
Step 14: Verify the init system, your current system using
$ ps — no-headers -o comm 1
Step 15: Assume you’re using systemd (systemctl) initialisation, then start MongoDB as starting mongod daemon via systemctl
$ sudo systemctl start mongod
If you get error “Failed to start mongod.service: Unit mongod.service not found.”, then execute below command and re-run start mongod command
$ sudo systemctl daemon-reload
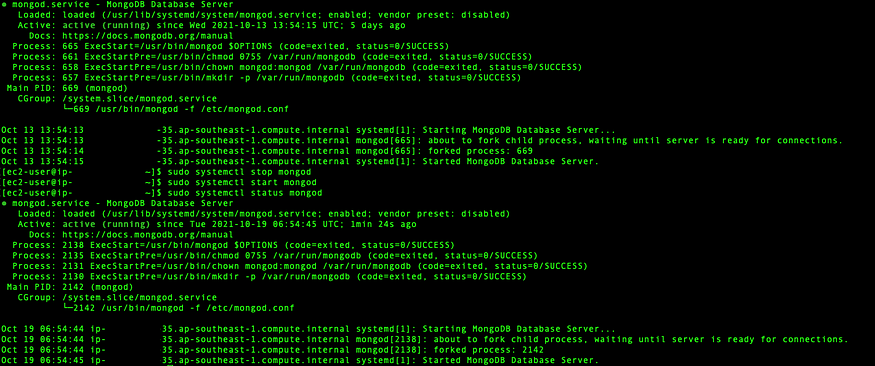
Step 17: Verify status of MongoDB
$ sudo systemctl status mongod
Step 18: Enable auto-start for mongod once system reboots
$ sudo systemctl enable mongod
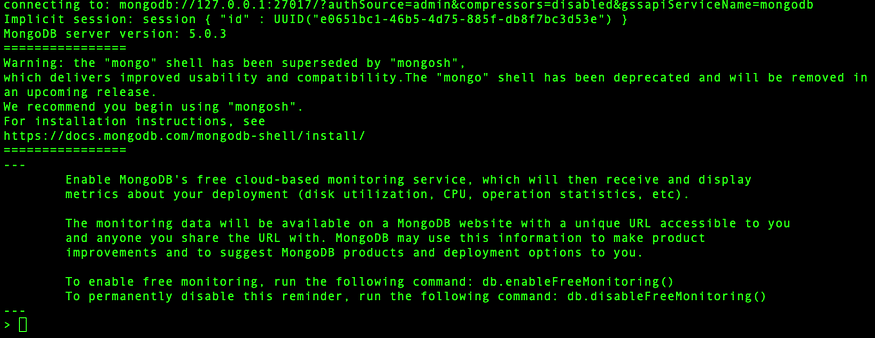
Step 19: Start using MongoDB
$ mongosh

Step 20: Create first root user at mongosh console
test> use admintest> db.createUser( { user: “<username>”, pwd: “<password>”, roles: [{ role: “root”, db: “admin”}]})
Step 21: Exit from mongosh console
test> exit
Step 22: Login with newly created user
$ mongo --username <username> --authenticationDatabase admin
MongoDB shell version v5.0.3
Enter password:
Step 23:Verify default built-in database
> show dbs
admin 0.000GB
config 0.000GB
local 0.000GB
Managing mongod process
# Stop mongod process
$ sudo systemctl stop mongod
# Restart mongod process
$ sudo systemctl restart mongod
# To check the state of process and error flow when requiring.
$ cat /var/log/mongodb/mongod.log
Uninstall MongoDB
# Stop current mongod process$ sudo systemctl mongod stop
# Remove any package of MongoDB installed$ sudo yum erase $(sudo rpm -qa | grep mongodb-org)
# Remove MongoDB database and log files
$ sudo rm -r /var/log/mongodb
$ sudo rm -r /var/lib/mongo
Default Configuration of MongoDB
Default MongoDB directory and configuration file locate at:
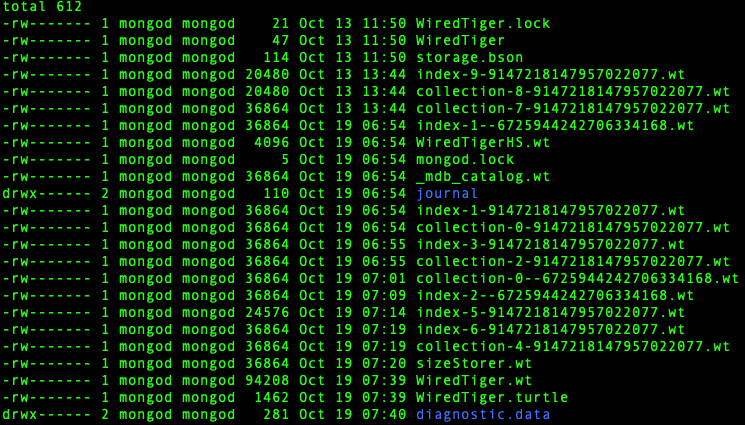
- /var/lib/mongo
- /var/log/mongodb/mongod.log
- /etc/mongod.conf
For further reference, please refer to MongoDB technical documentation at https://docs.mongodb.com/manual/tutorial/install-mongodb-on-amazon/

